


SUGGESTED SEARCHES
SUGGESTED SEARCHES
May 2023
Step-by-step guide on how to create an Innovation Hub article page from the template, rename, set up, populate, and add assets.
1. Navigate to https://aemauthor.fonterra.com/assets.html/content/dam and login so you have the AEM Dashboard open and the AEM Assets folders open.
2. Click here (AEM Assets folders)

3. Click here.

4. Click "Fonterra AEM Nutiani" folder.

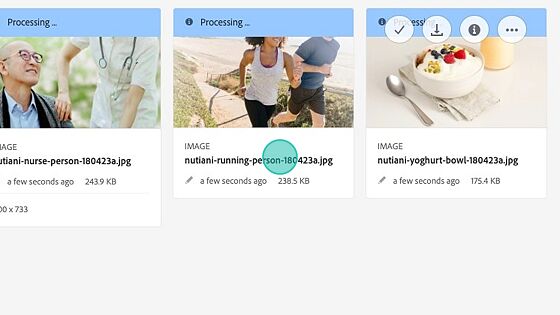
5. Click "FOLDER Article Images 1100 x 733"

Tip: Tip! You can drag and drop multiple images at the same time.
6. Drag and drop your images into this folder.

Tip: Tip! Optimise images: Images are one of the largest contributors to the amount of data transferred on most web pages. Load images at the correct scale so that you avoid loading images that are larger than the scale they will be displayed at.
Tip: Tip! Use a tool such as TinyPNG https://tinypng.com/ or ShortPixel https://shortpixel.com/ to compress image files without visible loss of quality. When these steps are followed, a significant reduction in image file sizes can be achieved, reducing energy consumption and improving load times with no perceivable downsides for website visitors.
7. Switch tabs and go to the AEM Dashboard > Click "Sites"
8. Scroll until you find Nutiani > Click "Nutiani - Wellbeing Nutrition Solution"

9. Click "Admin Only"

10. Tick 'Article template'
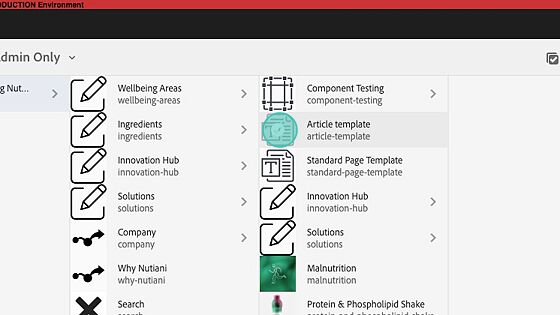
11. Click "Copy"

12. Click "Innovation Hub" and then click "Articles"

13. Click "Paste" and the copy of your Template will appear at the bottom of this column.

Tip: Tip! The top navigation menu will only appear if you TICK a page, if you CLICK a page you will see the child pages only.
14. Now that you are ready to rename this template, tick it.

15. Click "Move"

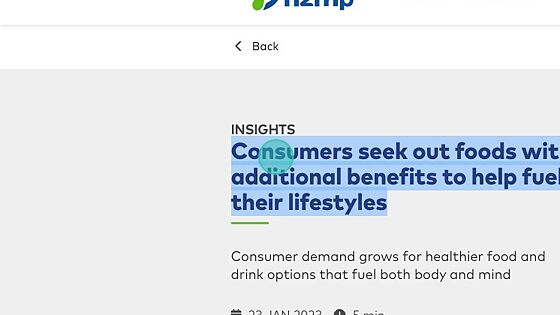
16. Open the article you want to upload to Nutiani (using an NZMP one as an example) Copy the title "Consumers seek out foods with additional benefits to help fuel their lifestyles"
17. Go back to your article tab. Click the "Page name after move" field and paste in your title. This can be the full article title with capitals and different characters as required.
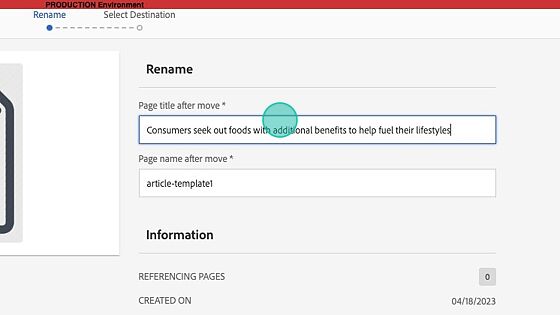
Alert: Alert! "Page name after move" will be the URL of the page so it MUST NOT include spaces, capitals or special characters !@#$%^&*(). Spaces must be replaced by hyphens ('-') You will get an error if you do not follow this.
18. Click the "Page name after move" field and enter the page name in lowercase with no spaces.

Tip: Tip! Example of Page Title After Move (Page title) and Page Name After Move (Page URL)

19. Click "Next"

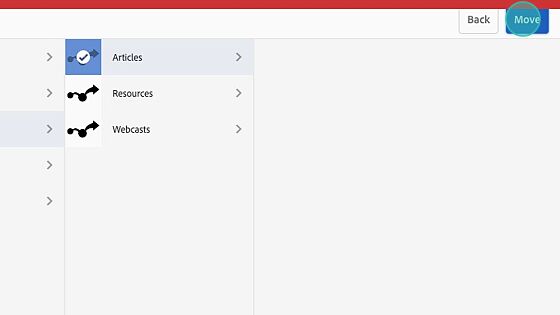
Tip: Tip! The PARENT page is the Article Page and the CHILD PAGE is the actual article page itself.
20. TICK the parent page you want your page to sit under. You want it to sit under the parent page "Articles"

21. Click "Move"
22. Click "Continue"

23. Click "Okay"

Tip: Tip! You may need to refresh this page to see the renamed article.
24. You will now see your article has the correct title you entered. Now to edit the page you need to tick the article.

Tip: Tip! The top navigation menu will only appear if you TICK a page, if you CLICK a page you will see the child pages only.
25. Click "Edit"

26. Click "properties"
27. Click "Open Properties"

28. Copy your title from the "Title" field.

29. Scroll down the page and paste your full title into the PAGE TITLE field and the NAVIGATION TITLE field.

Tip: Tip! You may want to shorten the NAVIGATION TITLE as this copy will appear in your navigation menu, and sometimes these need to be reduced in length so they fit.
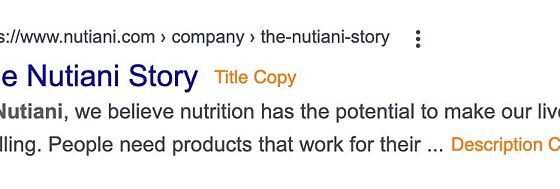
30. Return to your document and copy the "introduction" text.

31. Click the "Description" field and paste in your copy.

Tip: Tip! This description copy will display on the website in the listing component and also in a Google search so please make this only a sentence and to the point. Example below of a Google search result:
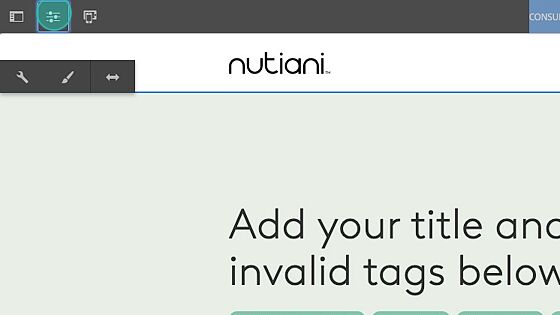
32. All the tags available have been added already, please click the "x" to delete and remove the ones that are not relevant to this article. Ideally you would like to have 4 tags maximum.

33. Once you have your tags set, click "Page Settings"

34. Click "calendar"

35. Give your article a date so it displays newest to oldest in the listing. The time is not visible so you can just leave that.

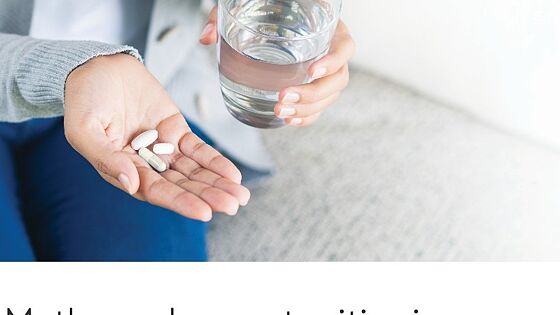
36. The TEASER IMAGE is the image that displays on the article listing page, you need to get the image URL and paste it in here:

37. Example: This is the teaser image on the article listing page.
Tip: Tip! When referencing a page or an image or a document in AEM the link URL will always start with "/content/dam/nutiani/........" You can click on the TICK at the end of the field and navigate your way to the asset/page or just copy and paste from the URL.
Tip: Tip! Click on the image you want to use, then copy the full URL from /content/... onwards and paste.

38. If you want to copy the image URL, return to the ASSETS folder, CLICK on the image/asset you want to use, and copy the URL from "/content/.... " forwards.
39. When AEM finds the asset/page you are linking to, it will confirm it with highlighting the file/page name in yellow, you can click this to confirm.

40. Click "Save & Close"

41. Click "configure" icon.

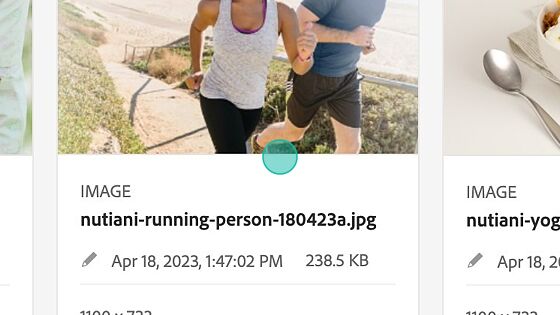
42. Paste the same URL path in here that you used for your Teaser Image, as the banner image and the page teaser image should be the same.
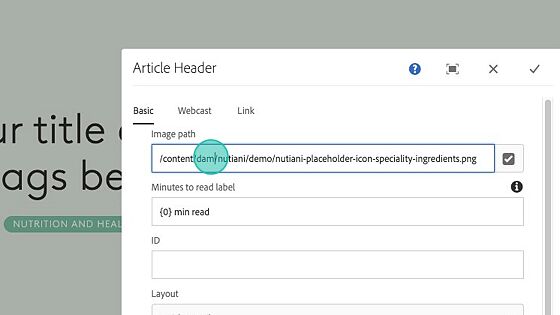
43. Example image path: /content/dam/nutiani/article/nutiani-yoghurt-bowl-180423a.jpg

Tip: Tip! When AEM locates the path, asset or page that you want to link to, it will confirm it has found the location by highlighting it yellow, click to confirm.

44. If you want to add a CTA Button (Call to Action) then you can upload the path you wish to link to and give the button a title (Link Label) if you leave these blank then they will stay hidden.

Tip: Tip! Always click the TICK to SAVE or click the X to cancel everything you have done within this component.
45. Click TICK to save or click X to exit without saving.

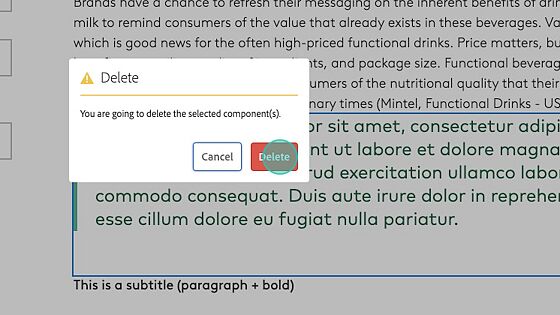
46. Click on the title component to select it.

Tip: Tip! Always click on the closest item you wish to edit, a blue line will appear if it is possible to edit, and it will display the component name in a blue box in the bottom right corner. Handy to get to know your component names to speed up future authoring.
47. Click "edit"

48. Highlight all the copy and paste in your title (this is the same title you called the page in the dashboard and in page properties) click outside of the box to save.

49. Initially it will load the copy in the same format you copied it from, however, once you click outside of the component it will be overridden by the site styles.

Tip: Tip! If at any stage things are looking strange or you can't do what you need, refresh your browser as the auto-refresh has been turned off to speed up authoring. Once refreshed everything will reload and should be as expected.
50. Click inside the text area to edit.
51. Click the PEN EDIT ICON.

52. Highlight the placeholder title and then paste yours over it.
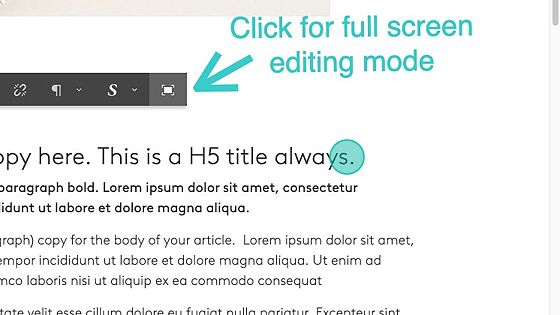
Tip: Tip! If you would like to author in a clean environment, you can click the last icon on the right, this is FULL-SCREEN mode. Make your edits and then tick to save and it will reduce.

53. When you have finished editing you can just click outside of the component you are working on.
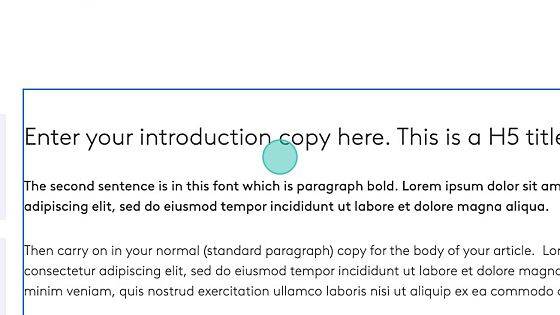
54. Now copy all the text you need for your body copy.
55. Click into the text box, then click the PEN EDIT ICON and highlight all the text. Then paste your new copy over it.
56. If you would like to add an image to the article body, click on the IMAGE component:

57. Click the top left-hand icon "toggle side panel"

58. The images you have just uploaded will be at the top. Drag and drop your image into the image component.

Tip: Tip! If you have uploaded images a few days back you may prefer to enter the PATH so you only get Nutiani images. Click the TICK as below and click SELECT, now you will only have Nutiani assets listed.

59. You can add a photo caption by the configure icon, if you do not populate the field, it will not display.

60. Click "Metadata"

61. Click this text field.

62. Repeat the process for additional copy and imagery.

63. If you have a pullout quote or content you would like to use, click this component and paste in your copy (You may need to refresh you page once pasted and saved)

64. Click "delete" if you do not require this or any other component on the page.
65. Click "Delete"
66. To add references click into the box and paste in your copy. Delete this component if you do not require it.

Tip: Tip! enter the reference copy by clicking the PEN EDIT ICON, then select FULLSCREEN ICON, then highlight the copy, and select the following 2 options:

67. To copy a component you already have on the page (this image for example) click it, so you get the blue outine:

68. Click "copy"

69. Scroll down to the component you want it to SIT ABOVE, then click that component:

70. Click "paste" and the Image Component will be replicated.

71. The IMAGE COMPONENT now appears above the References section. Now you can find the new image you would like to use and drag and drop it into place. You can copy and paste any component on the page.

72. Now you have all your copy and images on the page, click the PAGE INFORMATION icon.

73. Click "View as Published"

74. This will open your page in a new tab where you can see what it will look like then it is live and published. Scroll down the page and test all your links are working.
75. The ACCORDION COMPONENT will be collapsed now, so you can test this as well.
Tip: Tip! Copywriting has an impact on website efficiency because it affects the amount of time people spend browsing websites. Sometimes we want people to spend a lot of time on a website immersing themselves in our content. What we don’t want is for people to waste their time wading through content that offers little or no value to them. Therefore, clear and efficient copy writing can help reduce wasted time on the internet and in turn reduce wasted energy.
76. Return to the editing tab. If you click on the TEXT COMPONENT and select the FULL-SCREEN icon you can then view all your copy. I recommend you download Grammarly as a spell-check app. https://www.grammarly.com/

Tip: Tip! Please see PDF DOWNLOADS tutorial for the white papers etc. https://fonterra.atlassian.net/wiki/spaces/NW/pages/2624946540/Nutiani+Tutorial+Download+CTA+Component

STAY AHEAD


All rights reserved © Nutiani {year}