


SUGGESTED SEARCHES
SUGGESTED SEARCHES
May 2023
1. Navigate to https://aemauthor.fonterra.com/sites.html/content
2. Click "Nutiani Site"

3. Click "Content"

4. Click "New Zealand"

5. Click "Nutiani - Wellbeing Nutrition Solution"

6. Click "solutions"

7. Tick "Solutions Template".

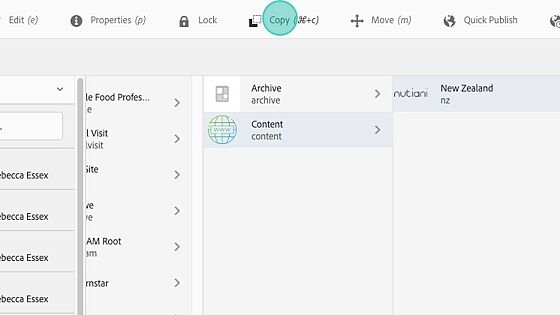
8. Click "Copy"
9. Click "Paste"

10. Your copied page will be at the bottom of your list and have a "1" at the end of the URL. Tick it to get the top menu to display.

11. Click "Move"

12. Click the "Page title after move *" field and enter the page title.

13. Click the "Page name after move *" field. This needs to be all lowercase and no spaces or special characters.

14. This field must only contain letters, numbers, dashes, commas and underscores and will not let you proceed until you have rectified this.

Alert: Filename handling and forbidden characters Experience Manager Assets prevents you from uploading assets with the forbidden characters in their filenames. If you try to upload an asset with filenames containing a disallowed character or more, Assets displays a warning message and stops the upload until you remove these characters or upload with an allowed name. To suit specific file-naming conventions for your organization, the Upload Assets dialog lets you specify long names for the files that you upload. The following (space-separated list of) characters are not supported: Invalid characters for asset name: * / : [ \\ ] | # % { } ? & Invalid characters for asset folder name: * / : [ \\ ] | # % { } ? \" . ^ ; + & \t
15. Click "Next"

16. TICK the parent page you want your page to sit under "Solutions"

17. Click "Move"

18. Click "Continue"

19. Click "Okay"

20. Now tick your new page to select it.

21. Click "Edit"
22. Click "properties"

23. Click "Open Properties"

24. Click the "Title *" and enter in your page title again.

25. Then copy and paste it into the PAGE TITLE and the NAVIGATION TITLE fields (note the Nav Title will display on your menu so ensure it is short and to the point so the manu can handle it)

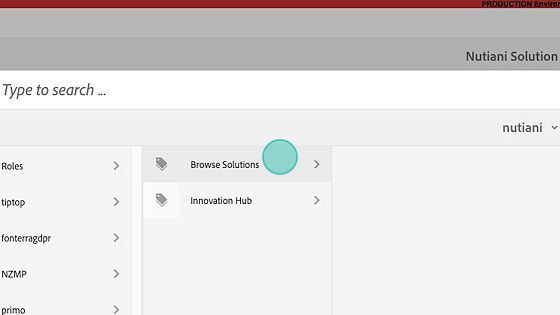
26. Click the "Description" field and enter a sentence outlining the page description. This will list on the website in a page listing and also in Google search.

27. This is the page tag. Delete the tags that are not appropriate for your page. Or to add more you can click the TICK and make your way thru the stages as per below.

28. Click "nutiani"

29. Click "Browse Solutions"
30. Click "Ingredient Type"

31. Click the appropriate tags.

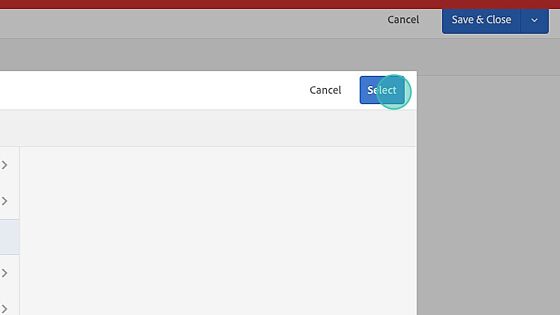
32. Click "Select"

33. Now Click "Page Settings" in the top menu.

34. Click "calendar"

35. Select a date, this displays on your page and also is how the pages are listed - by date created so the latest is always at the top.

36. Click the "Teaser image" field. Paste in the URL of your image, this will display in the dashboard and on the page listing tiles.

37. You can paste in the URL starting with "/content/...." or you can click the tick at the end of the field above and then click your way to your image.

38. Click "Select"
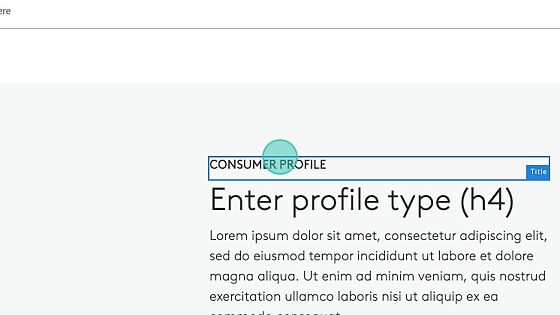
39. Click "Save & Close"

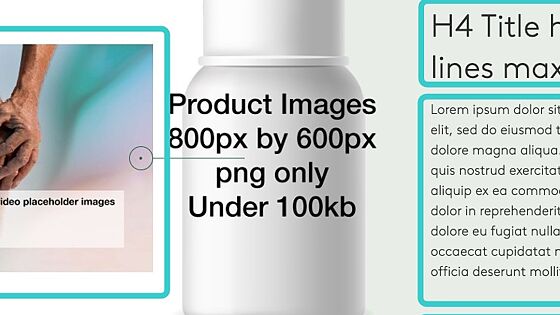
40. Click inside the banner area.

41. Click "Configure"

42. Now you can add the Solution Heading. These must be adding in capitals please.

43. Select your solution product image (by pasting the image path or click the 'tick' to find your image) 800px by 600px png.

44. Then you can select the background colour to match your solution category.

45. Click "check" to save and exit.

46. Click here.

47. Click "edit"

48. Enter your page title.

49. Click here and enter your into copy (this is the same as you entered in the description field in Page Properties)

50. Edit the CTA Button as you need, if you remove all the information inside the component it will not display on the published site.

51. Click here.

52. Click "configure"

53. Enter in your field titles.

54. You can add or remove as you need and drag and drop to change the layout order.

55. Click "check"

56. Click edit and swap your copy for each one. Keep this to a sentence only.

57. Repeat for each once.

58. Click here.
59. Click "edit"

60. Click here and enter your copy.

61. Do the same for the body copy.

62. Now you can add in your image that you have already uploaded.

63. Click "toggle"

64. Click here.

65. Now edit the copy in the 4 fields on the left and then drag an drop your image on the right. Repeat this process.
66. Repeat process. You can copy and paste more of these in if you require them or just select and delete if you do not need so many.

67. If you need to add some Resources you can do that here, or delete them if you do not require them (Copy and paste them if you require more).

68. Click "Properties"

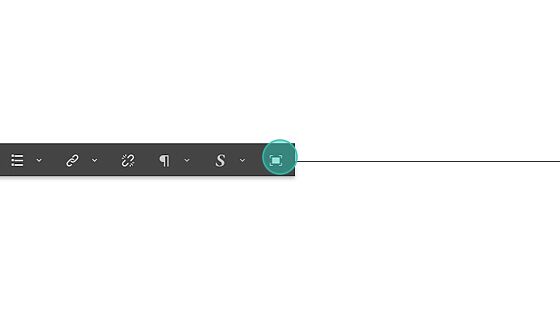
69. Click "External link"

70. Add in the URL of the asset, the file size and the file name.

71. Click "edit"

72. Click "full screen"
73. Paste in your references.

74. Highlight them all and select "Styles" and select "Caption"

75. Click "full screen exit"

76. Now you are ready to test your page. Click "properties"

77. Click "View as Published"

78. Now test your page, that the links are all working, that the references accordion is opening as it should etc. Now you can publish the page.

STAY AHEAD


All rights reserved © Nutiani {year}